


Clock Project
Introduction
A clock project based on the Seeeduino Xiao SAMD21 board featuring a 32-bit Real Time Clock (RTC) and calendar, a 128x64 OLED monochrome display, and powered by two AAA batteries (not practical due to high current consumption).
Gathering Components
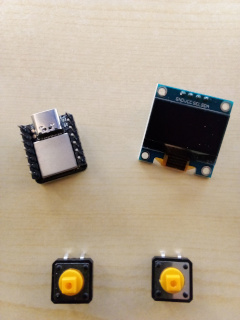
- 1x Seeeduino Xiao SAMD21 board
- 1x SSD1306 128X64 OLED Display
- 2x Tact Switch 12x12mm
- A set of male pin connectors with 2.54mm lead spacing
- Prototyping breadboard(s), wires (male-to-male), USB-C cable (for uploading code and board powering)
Prototyping
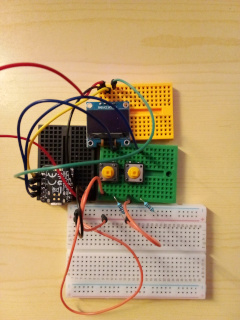
Prototyping with breadboards is a very convenient way to put a project together, allowing without complications, add or remove components, rearrange wiring, etc.
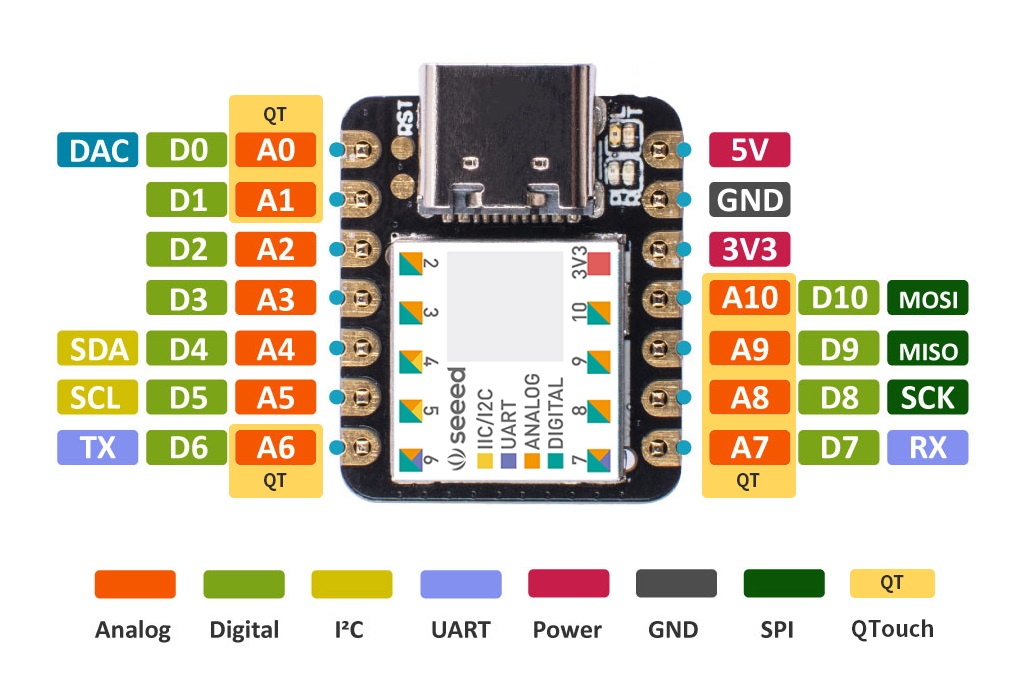
Here in picture below, project components are put together:
Wire connection diagram of the project:
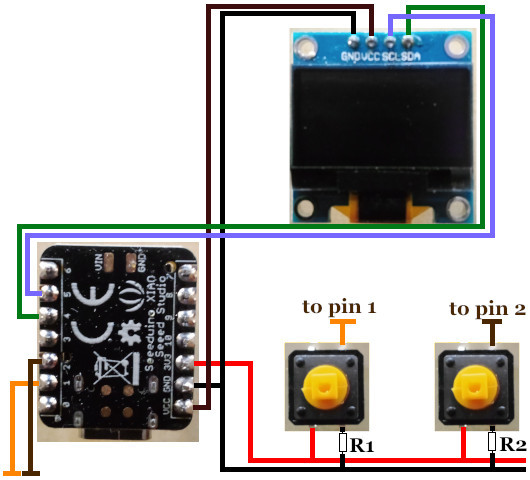
The display is connected to the board through pins 4 and 5, which are dedicated pins for data communication via I2C bus. Pin 5 is clock (SCL), and pin 4 is data (SDA).
The powering of the OLED display is carried out by pin VCC that provides it with 5V. However, using a 3V3 pin that provides 3.3V is also possible. The display's GND pin is connected to the board's GND pin.
Two Tackt Switch buttons are connected to the board via pins 1 and 2, where the 3V3 pin is connected to the IN pin of the button, and the next IN pin is connected to the ground (GND) through a 10kOm pull-down resistor. One of the OUT pins of buttons could be connected to any of digital I/O pins starting from D0 to D10, excluding pins 4 and 5 (I2C) that are used for data communication with the display.
Board's pinout from wiki.seeedstudio.com:
Board Programming
To execute a program on the Xiao board, we need to upload the program to the board. One of the popular methods to do that is using Arduino IDE, a development environment for the popular Arduino microcontroller boards.
On dronebotworkshop.com site, there is useful information about the Seeeduino Xiao SAMD21 board, particularly how to set up Arduino IDE for working with the board.
Download link for the project source file:
sketch_xiao_ssd1306_display_clock.ino | ver. 1.0
After opening the file with Arduino IDE, the program may fail to compile on the first attempt due to missing external libraries required for the sketch.
To fix that, we need to install missing libraries by selecting "Sketch" > "Include Library" > "Manage Libraries..." and in the search bar, type missing libraries:
- Adafruit GFX Library by Adafruit
- Adafruit SSD1306 by Adafruit
- Seeed Arduino RTC by Seeed Studio
- Time by Paul Stoffregen
Clock Testing
After compiling and uploading the program to the board, the MCU should begin executing the program. Program execution starts with setting up hours:
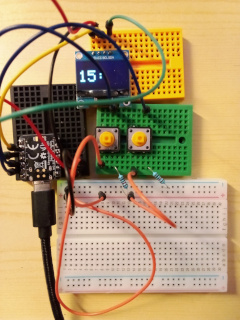
Value adjusting is carried out by pressing the right button.
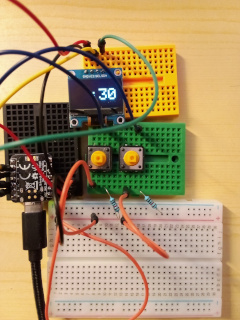
Press the left button to set minutes:
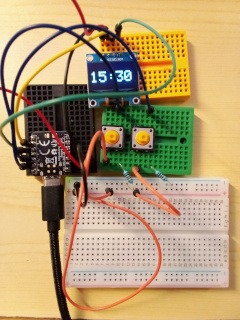
After setting the minutes, the left button will start the clock:
Putting All Together
The next stage of the project is to solder everything into the prototyping board. For this purpose, I'm using a universal double-sided board 40mm by 60mm.
It is recommended to first solder male connectors for the Xiao board without the board being attached to the connectors. This is because desoldering the board could be a tedious and impractical task if the board needs to be replaced. Only solder the board to the pins that are required for use.
The backside of prototyping board looks like this:
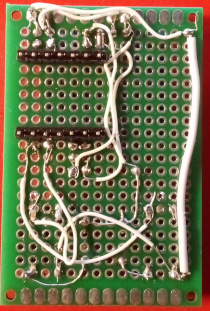
Because the universal board is double-sided I'm using both sides of the prototyping board for connections between components.
Board Powering
Before powering the board, it is important to check all connections on the prototyping board to prevent short circuits!
To provide stable 3.3V from double AAA batteries, I'm using U3V16F3 - step-up converter - 3.3 V 2 A - Pololu 4940.
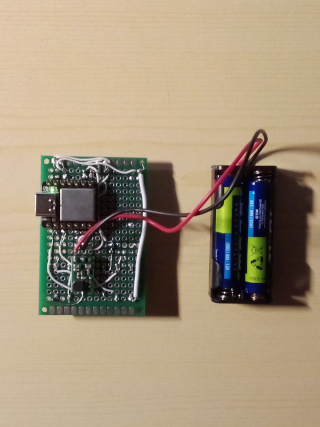
However, using batteries for this project is not feasible due to the high current consumption. In my case, the clock drew around 14mAh.
An everage AAA battery depending on type, could have a capacitance between 850mAh and 1200mAh. Based on the current consumption, the batteries tend to get depleted within approximately 2.5 days.
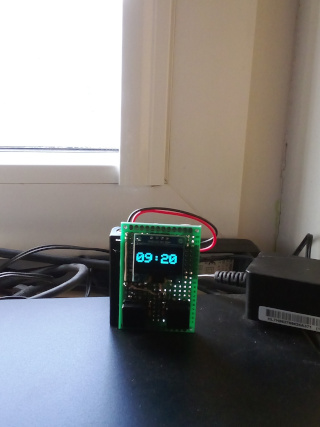
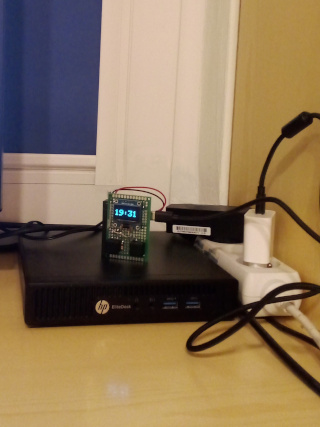
It is more convenient to power the board via a USB port (for example, using a phone charger):
Conclusions
The Seeeduino Xiao - SAMD21 is a small but powerful microcontroller that comes with a wide range of features, making it an ideal choice for a variety of projects.
However, using batteries is impractical due to high current consumption for projects requiring constant power.
It is worth noting that the Xiao board cannot maintain time-counting functionality when there is a power outage. This means that the clock must be manually reset after a power loss.
Adding an external RTC module to the clock (like DS1302 RTC) powered by a battery (CR2032) could eliminate the issue.